

Mars Drawing Ideas
The planet Mars is our neighbor in our planetary group, however, what certain individuals may not know is that the red smaller person is named after the Roman lord of war: Mars. He was viewed as perhaps the main god in the Roman confidence, and he addressed military strength and filled in as a gatekeeper image. He is much of the time portrayed as a fighter, and this is the portrayal we will use as we start this aide on the best way to draw Mars. [If you find kids’ education related data so visit our easy drawing for kids site].
In the event that you might want to know how to draw this lord of war, then, at that point, this is certainly the aid for you! Our bit by bit instructional exercise on the most proficient method to attract Mars only 6 simple tasks will tell you the best way to make great entertainment of this popular god.
Stage 1 - how to draw Mars
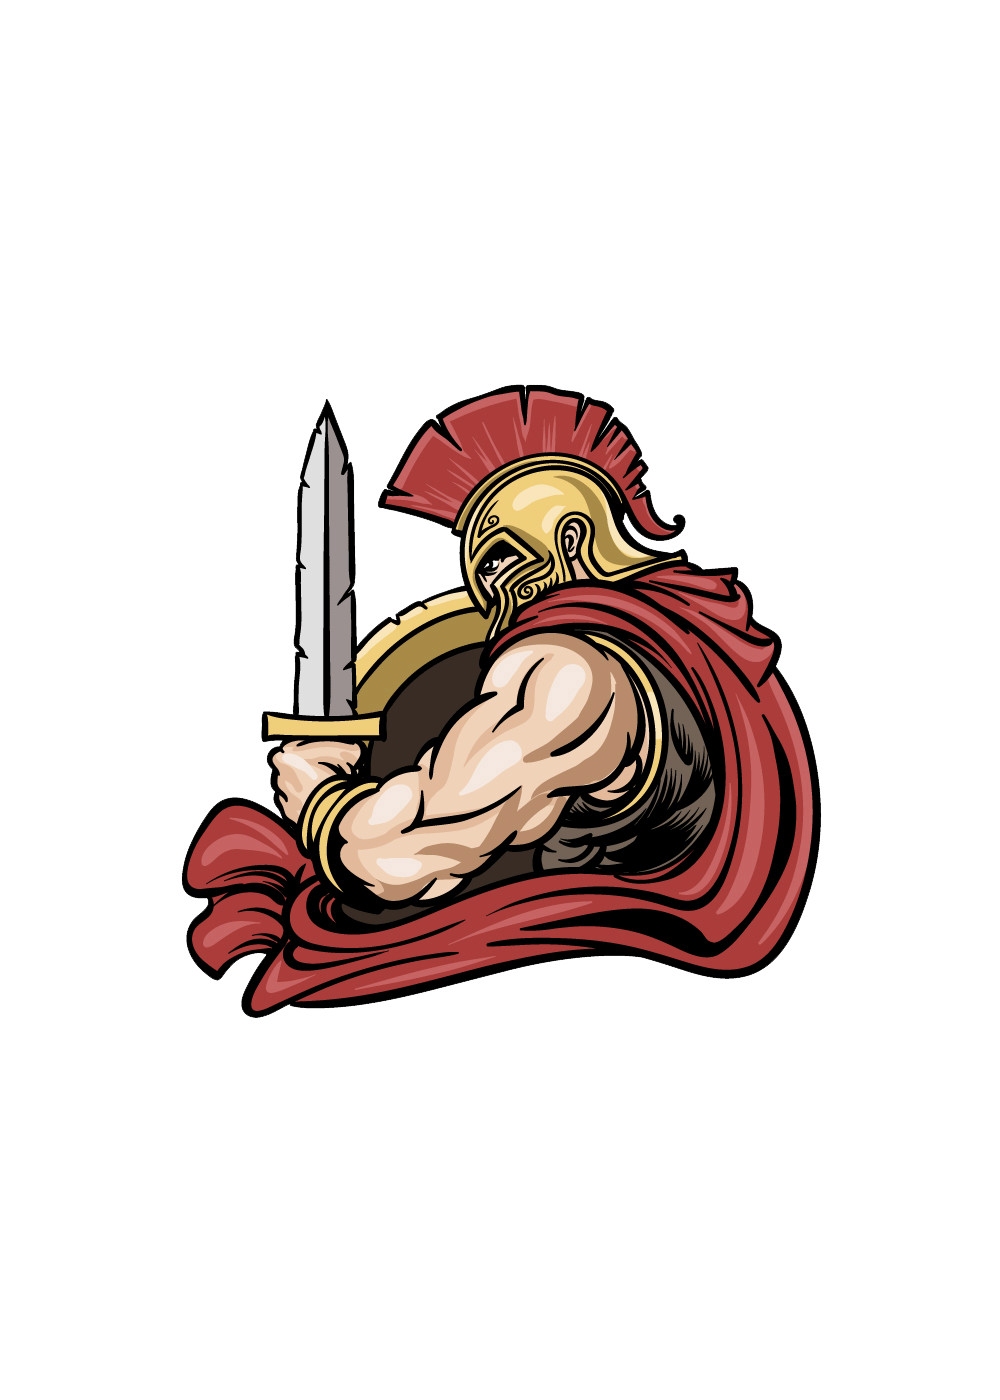
Mars will be kitted out in some conventional Roman conflict protection in the image we will attract this aide on the most proficient method to draw Mars. To start, we will be beginning with his cap, sword, and safeguard. Begin by defining a bent boundary for the highest point of the metallic segment of the protective cap.
It will have a fairly rakish opening that we will actually want to see some of Mars' face through. Then, utilize a few straight, rugged lines for the peak on top of the protective cap. Then, utilize a few straight lines for the cutting edge of his sword, and add a few scratches to it to make it look decent and fight harmed. There will likewise be a flimsy, rectangular base to it, and afterward, you can polish off this step for certain bended lines for his safeguard.
Stage 2 - Presently, finish his cap and draw his arm
Presently, we will draw the foundation of the cap and arm for your Mars drawing. Utilize a few bended lines for the edge at the foundation of the cap, and afterward, you can draw his ear appearing on the other side. Then, at that point, we will draw the arm that is gripping the sword, and seeing as he is the divine force of war we will make it very huge and solid.
Utilize a few bended lines to make the huge arm as it shows up in the reference picture, and you can likewise add a bracer around his lower arm. At last, polish off this step by drawing his hand gripping the handle of the blade.
Stage 3 - Next, draw his streaming cape
Progressing forward with this aide on the most proficient method to draw Mars, we will draw his streaming cape. This can be drawn with bunches of bent and adjusted lines that begin at his back. The cape will be streaming forward under his arms to make a more sensational search for it. The explanation we are utilizing so many bent line subtleties is to cause the texture of the cape to appear to be more wrinkled and finished.
Whenever you have drawn this cape, we can then continue toward the subsequent stage of the aide!
Stage 4 - Draw a few fine subtleties for Mars
This step of your Mars drawing will see you adding yet more line subtleties to different region of the drawing. This will again be to make a more finished, reasonable search for the lord of war. To start with, we will add bent lines onto his arm to make some more muscle definition for it.
Then, at that point, we will likewise be adding yet more line enumerating to his cape to make it look much more wrinkled. You can then polish off with some enumerating for the apparent segment of the chest piece of his reinforcement. Whenever that is drawn, you will then, at that point, be prepared for a few last subtleties in the following stage, so we should continue when you're prepared!
Stage 5 - Add the last contacts for your Mars drawing
You're practically prepared to add a variety to your unimaginable picture. Yet first, we will add some last contacts in this step of our aide on the most proficient method to draw Mars. The most compelling thing that we will truly do in this step is to draw some concealing subtleties for certain pieces of the drawing.
You can add a portion of these concealing subtleties to his protective layer and the finish of his lower arm. Then, we will draw some enlivening subtlety for his head protector. Whenever you have drawn these components, you can polish them off by adding your very own subtleties! Maybe you could draw an awe-inspiring fight scene behind him for one thought. What setting might you want to make for your picture?
Stage 6 - Polish off your Mars drawing with some tone
This last step of your Mars drawing will see you polishing it off with some tone! In our reference picture, we kept with the standard tones for antiquated Roman stuff and consolidated a few reds and golds for his covering, cape, and peak. We additionally involved a few shades of brown for the cowhide parts of his protective layer, and you can utilize our reference picture if you would like these equivalent tones for your image.
At the point when you realize which colors you might want to go for, it's only a question of picking which workmanship mediums you will use to rejuvenate them. We can hardly hold back to see what you choose to go for!
